How To: Create an Indoor Bulb Arrangement for Christmas

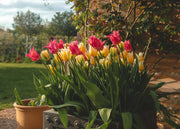
Spring flowering bulbs have long been ‘forced’ indoors to provide a tantalising taste of spring in mid-winter. There is sometimes a misconception that forcing bulbs is a complex process, but put simply, it’s just tricking the bulbs into thinking they have experienced a full winter, by creating an artificial cold spell.
This can easily be achieved in the fridge at home over 10-15 weeks, but bulbs will need to be planted in September for a Christmas display. If you’re short on time, we have readily prepared bulbs and tender varieties available to plant now without needing this treatment.
- A container, this could be a pot, wooden crate, bowl or even a wide-necked vase.
- Peat-free potting compost
- Bark
- Grit, sand and stones to help with drainage
- Bulbs such as prepared Amaryllis, Paperwhite Narcissus and Hyacinths or any Spring Flowering Bulbs you have chilled at home.
- Flat moss
- Watering can
- Gardening gloves
Quantities required will depend on your container size. Be generous with the amount of bulbs that you use, as not only will this create for a show stopping display, but the bulbs will also help to support each other as they grow. For our large arrangement here, we have used nine Paperwhite Narcissus bulbs in our Large Elin Bowl Planter, which is 12cm in diameter.
Join us in store to purchase any of the above elements, our Houseplants Team are always happy to advise on combinations and care.

Pick your favourite bulbs and a container, here we have used Paperwhite Narcissus. Choose any container that is large enough to hold your desired bulbs and potting mix. Decorative pots and bowls with cheery colours look fabulous on a Christmas table, and glass vases and bowls, where roots can be seen growing also make for a very special display. We have chosen a Large Elin Bowl Planter.
Indoor Bulbs
It is important to prevent your potting mix getting too wet, so drainage is key. If your container has no holes, make sure to add a layer of stones or grit at the bottom. Fill your containers with peat-free potting compost mixed with bark, leaving space at the top for your bulbs.


Place your bulbs on the compost with the pointy growing end facing up, ensuring they're not touching the sides of the container or each other. Plant generously in odd numbers.

Add any decorative twigs and branches, (not only will this look beautiful, but it will also help to support your bulbs as they grow). Gently cover the bulbs with sphagnum moss to reduce soil splashback and help to prevent moisture evaporating so quickly indoors, whilst creating an indoor woodland look.

Using a watering can, moisten the soil evenly. Avoid overwatering, as soggy soil can lead to bulb rot.
Store your planted containers in a cool, dark location for several weeks. This allows roots to establish, without encouraging premature sprouting.
Once shoots emerge, move the containers to a well-lit spot with indirect sunlight. Rotate them occasionally to ensure even growth.
As Christmas draws near, the blooms will begin to unfurl, filling your home with colour and fragrance. If you find your bulbs are blooming too quickly, move them to a cooler place, even outdoors, to ensure they look their best for the big day!

- Place the arrangement in a naturally lit position but avoid direct sunlight.
- Mist to keep your moss fresh and healthy, but avoid the bulbs which need little moisture and only require a weekly water.
- Admire your creation as it grows. Deadhead blooms as they fade but leave the foliage to go yellow and the nutrients to return to the bulbs. Once finished, you can plant your bulbs in the garden ready to make an appearance in spring the following year.


